This guide was adapted from a presentation by District 28 member and Pathways Guide Richard Durling. While the content here is specifically focused on onboarding new members, much of it also applies to current members who are transitioning to Pathways.
Congratulations! If you’re reading this, you’re probably new to Pathways, or someone who’s helping a fellow member get up to speed in Pathways. There are a couple of things you’ll need to do to get up and running with the Pathways program. We’ll cover them in order below.
- Get a password for the Toastmasters International website and log in
- Take the Pathways assessment (this is optional, but we’ll discuss why it’s worthwhile in a moment)
- Select a path
- Understand Pathways terminology: curriculum, levels and projects
- Understand how to access Base Camp and navigate within it
Note: this guide assumes that you’ll be using Base Camp, the online gateway to Pathways. If you’d prefer to work exclusively with printed manuals, please work with your VP of Education to get your manuals ordered and understand how to track your progress in the program.
Let’s get started! If you have any trouble following along, please send us a note so that we can continue to improve this guide.
Getting a Password
The Toastmasters International website, located at toastmasters.org, is where you’ll choose your path and track your progress in Pathways using the Base Camp platform. Before you can access Base Camp, you’ll need to log into the Toastmasters International site. To do that, you’ll need a password (you’ll also need to be a member of a Toastmasters club). Here’s how to set up a password if you haven’t already done so:
- Go to https://www.toastmasters.org/login
- See that line at the bottom about “Toastmasters members logging in for the first time”? That’s you! Click the “Forgot password” link.
- On next page, enter the email address that you used on your membership application and click “Submit,” then keep an eye on your inbox for instructions on how to log in.

Logging In
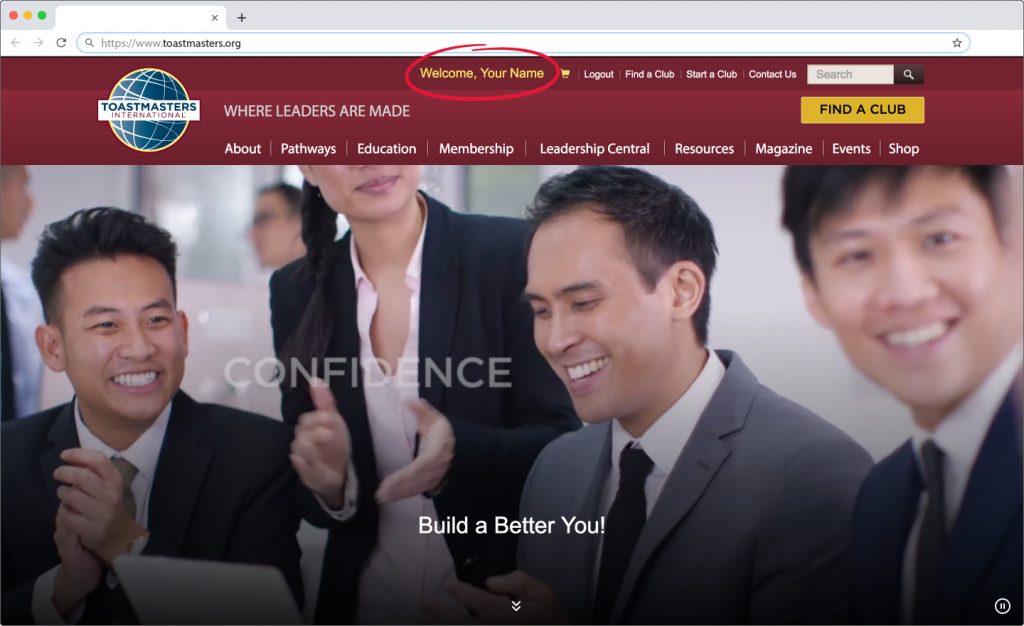
Once you have your password, log into toastmasters.org. To confirm that you’re logged in, look for your name at the top of the page (if you’re using a device with a wider screen), or at the top of the mobile navigation menu if your screen or browser window is narrower (for example, on a mobile device).
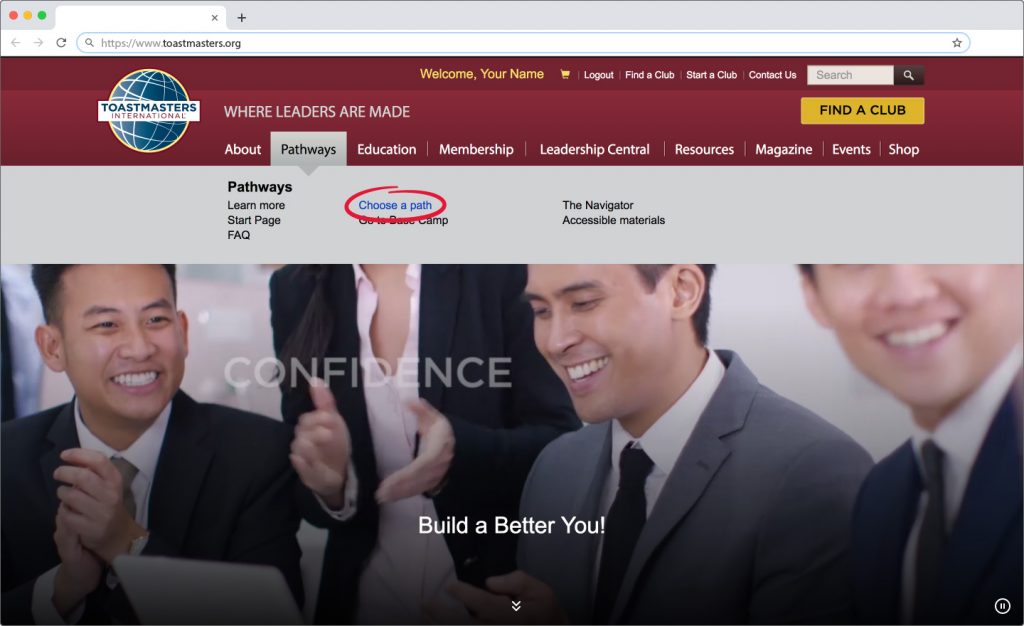
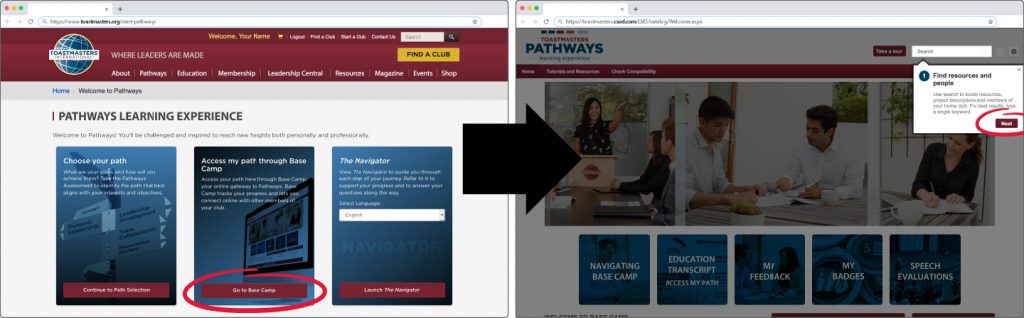
Once you’re logged in, click on “Pathways” in the navigation menu, then click “Choose a path” to navigate to the Pathways Learning Experience landing page.
Taking the Pathways Assessment
You don’t have to take the Pathways assessment, but it’s a great way to zero in on a path that fits your needs and goals. Don’t worry—you aren’t required to choose one of the paths that it recommends, and you can retake it as many times as you want. Your answers to the questions are private.
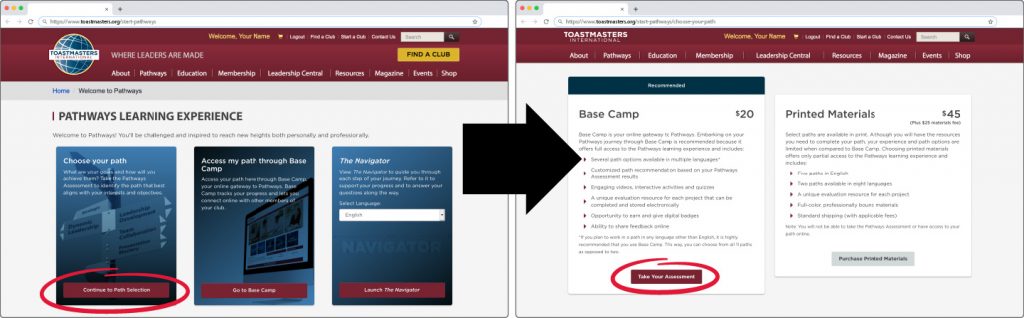
Whether you plan to take the assessment or not, you’ll need to click “Continue to Path Selection” and then “Take Your Assessment” (you can skip it in the next step).
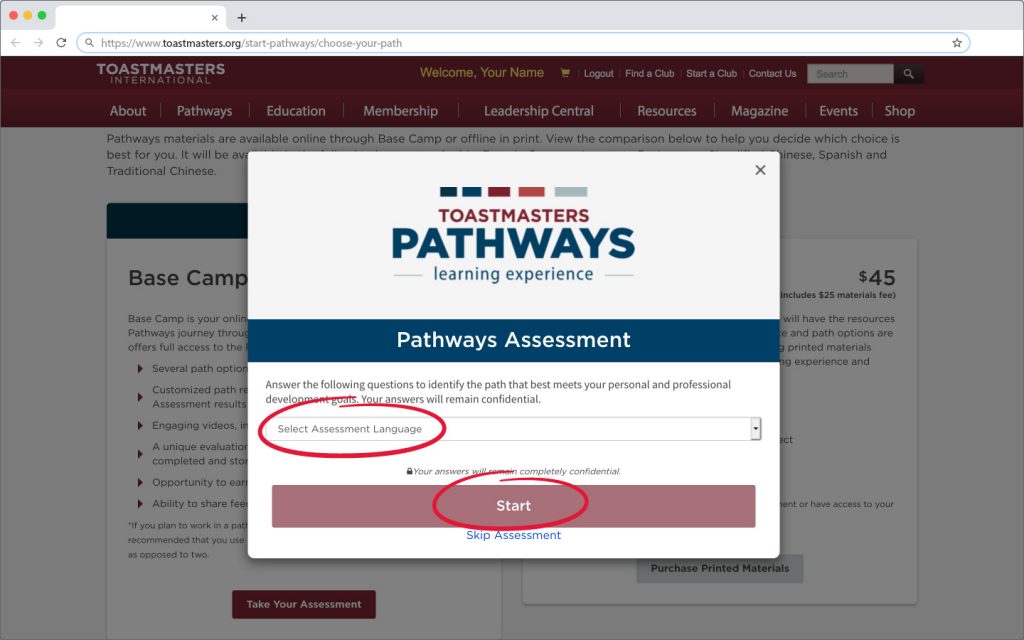
To skip the assessment, click “Skip Assessment” at the bottom of the dialog window that appears and jump to the Selecting a Path section of this guide (below). Otherwise, use the drop-down to select a language for the assessment and click “Start” to begin answering questions.
After you answer each question, click “Next” to go to the next one.
Selecting a Path
You’ll eventually end up on the “Recommended Paths” page, where you’ll be able to choose your path. If you skipped the assessment, you’ll see all of the paths listed in alphabetical order. If you completed the assessment, you’ll be presented with a “top three” choice of paths based on your answers, with one path indicated as the best match. You can see the rest of the paths by clicking the “Additional Paths” button below your top three.
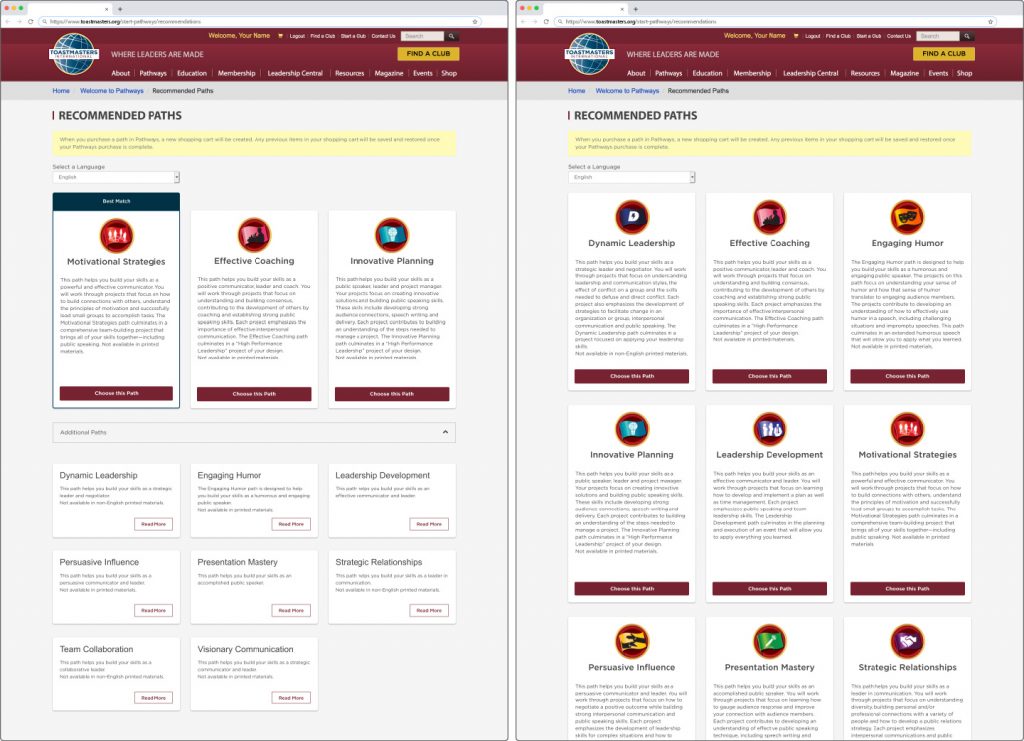
To select a path, click the “Choose this Path” button. If you completed the assessment and want to choose a path that wasn’t in your top three, you’ll need to click the “Read More” button first and then “Choose this Path” in the description window that pops up. After choosing a path, follow the instructions to complete your order.
Exchanging Your Path
If you choose a path and decide that it’s not for you, you can exchange it for a different path within 30 days, but keep in mind that you can only do this once per program year. See “What is the Pathways Return Policy” in the Pathways FAQ for more details on exchanges.
Understanding Pathways Terminology
Before we dive into Base Camp, there are a couple of key terms that you should be familiar with in order to understand your progress through Pathways.
Curriculum
Once you’ve chosen a path, you’ll have access to the curriculum for that path in Base Camp. The curriculum outlines all of the levels in your path and the projects required to complete each level.
Levels
The curriculum for each path is broken up into five different levels. You’ll receive credit from Toastmasters International for each level as you complete it, and you’ll receive credit for completing the entire path when you complete all five levels within the path.
Projects
To complete a level, you’ll need to complete each of the required projects within the level, usually by preparing and presenting one or more speeches to your club. You’ll receive an evaluation for each speech you give, and you’ll learn to give your own evaluations of other people’s speeches. This self-paced, give-and-take approach to participatory learning makes up the core of the Toastmasters educational experience.
Receiving Credit
When you complete all of the projects in a level, be sure to let your VP of Education know so that you can receive credit for completing your current level and move on to the next one.
Accessing & Navigating Base Camp
Now that you understand the big picture of Pathways, let’s hop into Base Camp and learn how to get around.
Once you’ve finished choosing your path, return to the Pathways Learning Experience landing page and click the “Go To Base Camp” button. If this is your first time accessing Base Camp, you may want to follow along with the series of tips that appears (click “Next” on each one to proceed through them).
When you complete all of the projects in a level, be sure to let your VP of Education know so that you can receive credit for completing your current level and move on to the next one.
Accessing Your Curriculum
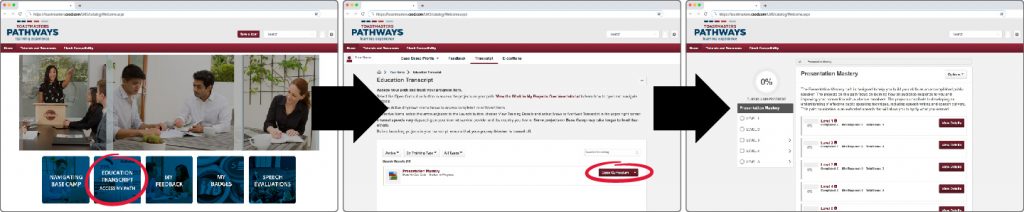
Click on the big blue “Education Transcript (Access My Path)” button to view your education transcript. As you progress through Pathways, you’ll see more items appear here. For now, you can access the curriculum for your path by clicking the “Open Curriculum” button next to the name of your path.
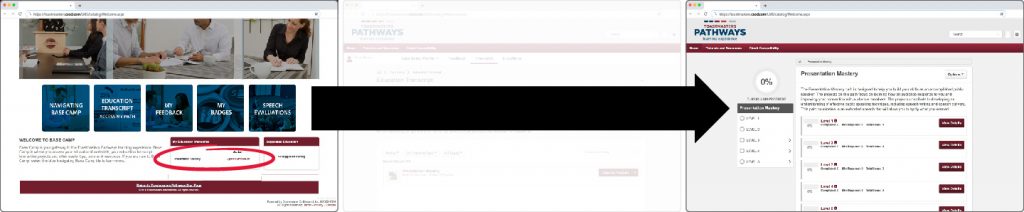
A tip for later: you can also jump directly from the Base Camp home page to your curriculum (skipping the transcript page) by using the links in the “My Education Transcript” box that appears near the bottom of the Base Camp home page.
On the curriculum page for your path, you’ll see an indicator of your progress through the curriculum, as well as a list of the levels in your project. To see what’s in each level, click on the “View Details” button beside it, or just click on the name of the level itself.
For now, click on “Level 1” to see what’s inside.
Accessing a Project
Once you’ve clicked into a level, you’ll see a list of projects to complete. If a project’s status is listed as “Pending Prior Training,” you won’t be able to access it until you’ve completed the prerequisites for the project (usually a previous project).
Note: projects will launch in a pop-up window (or a new browser tab, depending on your browser settings), so you’ll need to make sure your pop-up blocker is disabled for Base Camp. You can confirm this using the Base Camp’s compatibility checker. To access the compatibility checker, hover over “Check Compatibility” in the red navigation bar and then click on the drop-down link when it appears. To get back to your curriculum, use the same “hover, then click” technique on the Home button, then use the steps outlined earlier to navigate from the Base Camp home page to your curriculum.
Once you’ve returned to the Level 1 curriculum, get started by launching your Ice Breaker—the first project that every Toastmaster completes. Click on the “Launch” button next to the Ice Breaker project.
Navigating Within A Project
Once your Ice Breaker project launches, click on “Begin” to start working through the project. The next screen that you see will explain how to navigate within the project.
Note: if your project launched in a separate browser window rather than a new tab, you may need to adjust the size of the window (or maximize it) in order to see the whole thing.
You can also use the drop-down menu at the bottom to navigate between sections.
Off & Running
That’s it—you should be ready to start working on your path! There’s more help available in the Tutorials & Resources section of Base Camp, if you need it. If you still have questions, please talk to your VP of Education, or reach out to one of our Pathways Guides. You can find their contact information on our Pathways resources page, along with a number of other helpful items.
As Toastmasters, we thrive on feedback. Whether you found this guide helpful or confusing (or both), please let us know so that we can do more of what works and less of what doesn’t. Congratulations on taking this first step, and good luck with your Pathways journey!